Vacation Bible School
Fruit of the Spirit
This year we did a Fruit of the Spirit theme for Vacation Bible School. I had the task of coming up with three crafts for our three-night event. I'm going to show you the crafts we did and tell you how you can do them better.
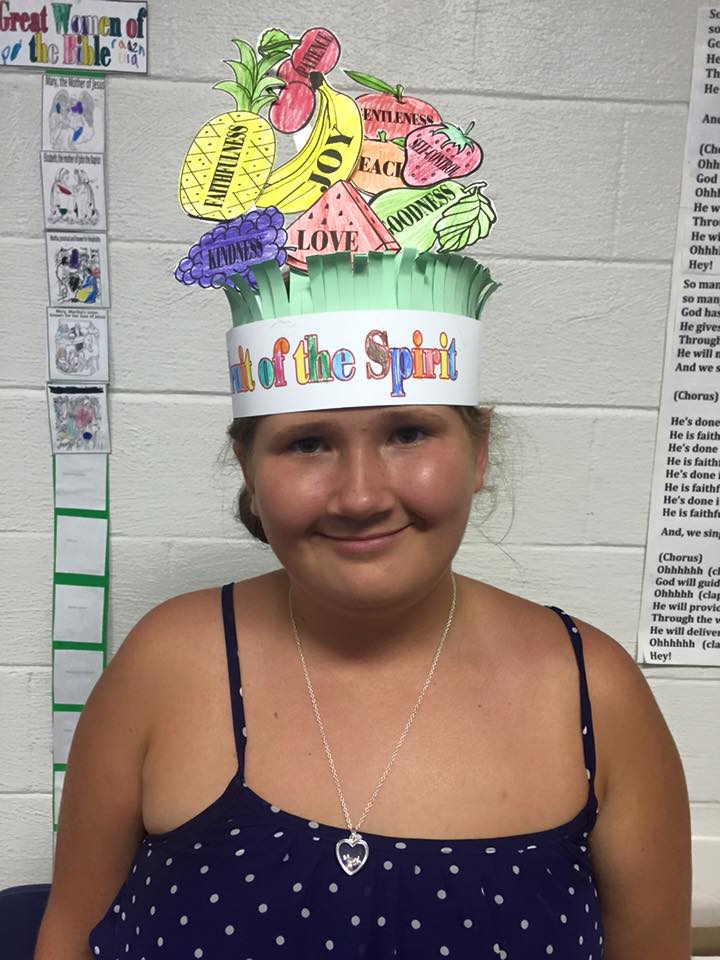
First night, we did a Fruit of the Spirit Crown:
This was a big hit! I printed off the fruit on card stock and while watching TV at night, I'd cut out all those fruit. Also, cut green paper so that it looked like grass and made the banner.
 |
| Here's the fruit. You'll need one card stock print for each child. I always try to print off extra in case more kids show up than I expected. I still haven't figured out how to embed a pdf file into my blog. Sorry. But hopefully you can drag this to your desktop and put it in your photo album to print. Like I said, I sat night after night cutting out fruit for this project. It's time-intensive, but a great craft! |
 |
| The headband for the crown. I also cut out plain pieces of card stock to hot glue to these headbands to customize to each child's head. | | | | | | |
|
|
 |
| Sweet Kadie shows her masterpiece! |
|
|
|
 |
| Way to go, Hannah! What a beautiful crown. |
|
|
One thing I realized from doing this craft is that you need to have all the components hot-glued onto the headband before the kids start coloring them. We had only 20 minutes for crafts and it took all three nights to finish up this craft. You don't have to have the fruit in exactly the same position. It makes each one individual for there to be some differences. So, cut out the pieces and hot glue them together. Then the kids can come in and just color and have the crown customized to their heads. That way, they'll be able to take their crafts home that night.
 |
| Reese coloring her Fruit of the Spirit craft. |
|
|
 |
| My littlest crafter for the week, Eliza. Great coloring, Eliza! |
|
 |
| So, if I had it to do over again, I'd go ahead and hot glue the fruit onto the headband, so that the kids could just come in and color the pieces. Then, the craft would have been completed the first night. More time-intensive prior to VBS, but much less stressful the night of. I just cut out different lengths of card stock to attach the fruit to the headband. |
|
|
|
|
| | | | |
|
|
 |
| https://gainesvilletheologyontap.wordpress.com/2010/08/20/fall-2010-series/ |
The second night we did this very easy craft. The kids were able to complete it that night. I found this wonderful print at the url address printed in the caption above. I printed them off on card stock and then found some glow-in-the-dark paint. I painted each dove with the glow-in-the-dark paint and let them dry prior to VBS. I took a small hole punch and strung fishing wire at the top for a hanger.
 |
| One thing nice about this craft is that it gave the kids a chance to show their own individuality. |
|
|
The third night we made Fruit of the Spirit charm bracelets. The kids LOVED them! Still yet another time-intensive craft prior to VBS, but so well worth the time and effort.
 |
| https://www.etsy.com/listing/44892492/100pcs-tiny-fruit-salad-charms-wee?ga_order=most_relevant&ga_search_type=all&ga_view_type=gallery&ga_search_query=plastic%20fruit%20charms&ref=sr_gallery_9 | | | | |
I found these wonderful inexpensive plastic charms from Etsy. I got two packages. There are about 100 charms in a bag for about $7. I divided them up into the individual packs for each child, including a piece of small gauge wire that would fit through the holes. These look big in this picture, but they're really small. Also, I included little 4mm silver balls as spacers and toggle clasps to attach the bracelet to the child's wrist.


I took paper plates and attached folded over painter's tape, then placed
the spacers and fruit charms on them to make it easy for the children
to pick up the items without everything rolling all over the floor. And,
PRAISE GOD!, it worked. I was really impressed at how well the
children were able to string these little silver balls and charms onto
the small gauge wire. Only the smallest of children needed help. And,
at the end I twisted the wires around the toggles to hold in place. Be
sure to attach one toggle to one of the wire prior to the kids stringing
the beads. Before they begin stringing their beads, place the wire around their wrists and allow just enough at the end to make the bracelet easy to move around the wrist and enough wire to tie off the other toggle.
 |
| Mason loved his Fruit of the Spirit bracelet. |
|
|
 |
| Fruit of the Spirit POWER! |
|
|
|
 |
| Everyone LOVED this craft. And, it really did come out pretty. Well worth the time and effort doing it. |
|
|
I love seeing these smiling faces!
 |
| Add caption |
Enjoy! I hope I have helped someone else prepare for a Fruit of the Spirit Craft time at Sunday School or Vacation Bible School